
Chapter 3: Want to make a simple vase?
Welcome to the third chapter in the Blender Tutorial Series where we will learn to build a vase. Before you start reading, do check out other chapters as well.
Chapter 1 talks about the basics of the Blender and its functionalities.
Chapter 1: Introduction to Blender
Chapter 2 talks about things that you should avoid as a beginner.
Chapter 2: Things to Avoid When Starting Out
Let’s learn a quick technique to help you with understanding some basic hotkeys and tools we have. To make a vase in blender, follow these simple steps below:
- Hold the ~ (tilde) key and choose the “Front” view. This hotkey is useful for switching to precise and exact camera angles. In our case, it makes you face the front, as if you are looking at a 2D plane, rather than the bird’s eye view we usually get when we open up blender.

- Hold shift and middle mouse key to move your “camera” without accidently getting out of this “Front” 2D-esque view. Use the middle mouse button to zoom in and out until you feel like you have a good view of where your vase would be.
- Shift + A >> Mesh >> Cube. Do this to create a cube (this is assuming you don’t already have one when you boot up blender). Shift + A is the go to hotkey for adding any new models in your blender project. Click the cube after you’ve created it.

- Click Tab. This takes the object and switches it from “Object Mode” (see the top left of your screen) to “Edit Mode” which allows you to edit the object.


- Click 1 in edit mode. This changes the mouse section from selecting the cube’s faces or edges (AKA lines on the cube) to only selecting vertices (AKA single points).

- Click A to select all. This will select all the points at once.
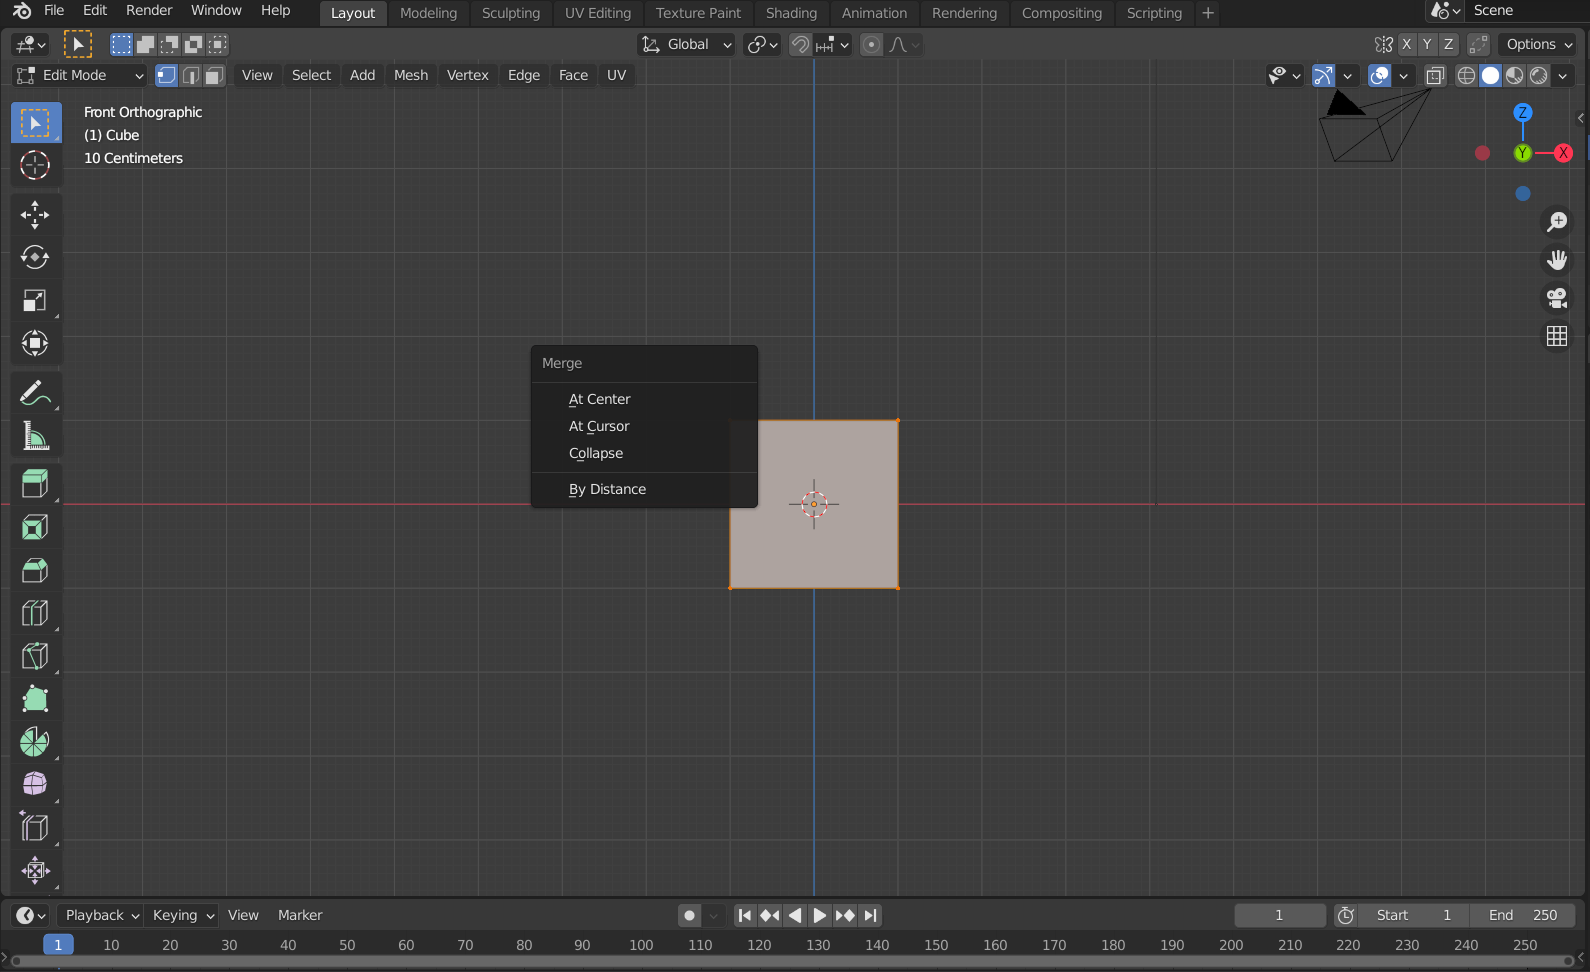
- Press M and choose “merge at center”. This will merge all the points of the cube into a single point at the center of all the other points.
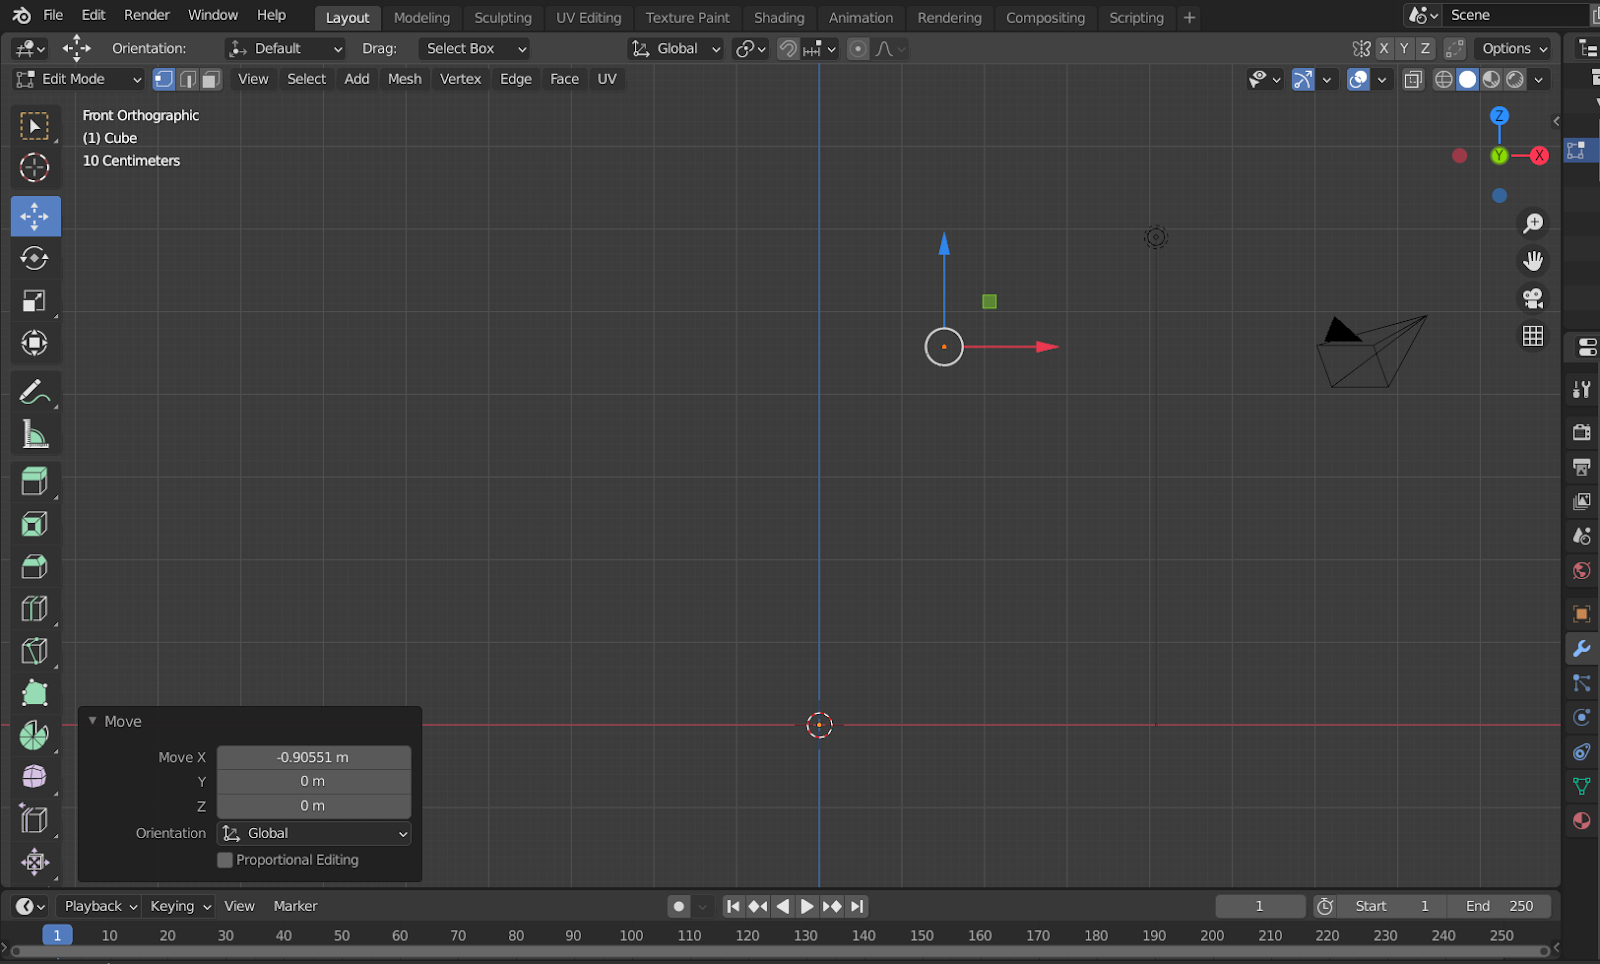
- Press the “Move” option on the left side of the viewport on the object tool menu to move the point that is selected. If you can’t see the single point that remains, just press A again and the move tool and you should see it selected. Alternatively, you can press G for the hotkey and press X, Y, or Z to move the point as well.

- Move the point to a place on the screen where the top right of the vase would be.
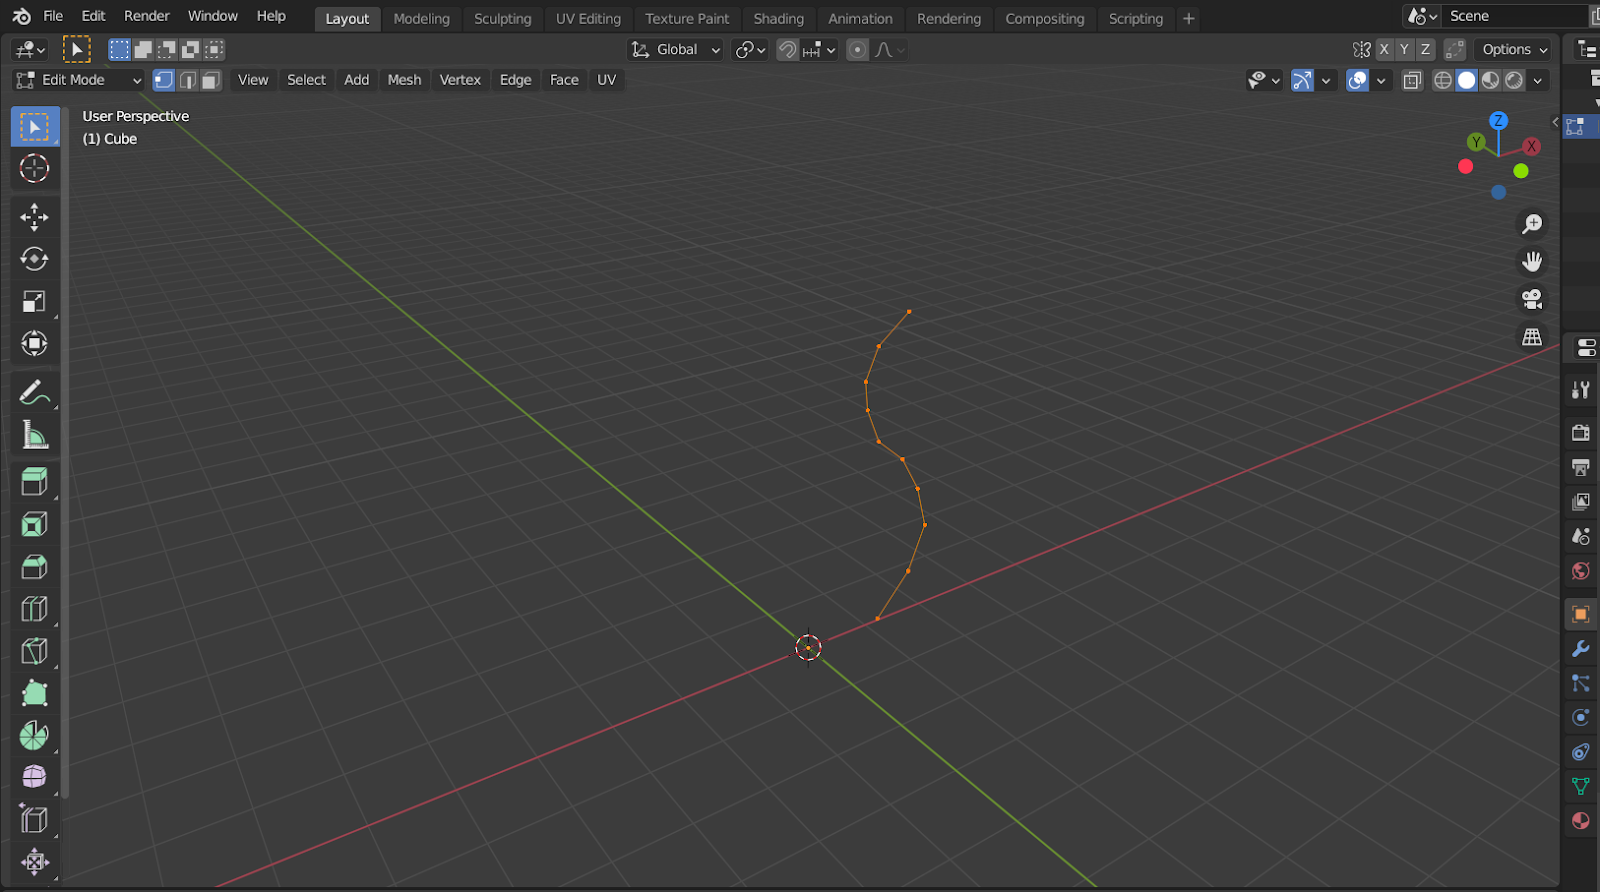
- Press E to extrude lines from that single point and draw the outer edge of the shape of the vase the best you can, pressing E for new lines each time.

- Now that you have the shape you can hold the middle mouse key and move it to get a better view of this partial “edge loop” of the vase. Edge loops just mean edges that are connected to each other.
- Press A to select all the vertices that you just drew earlier for the vase. Remember, you must be in Edit Mode to select all these vertices and you can’t get into Edit Mode without first selecting the object in Object Mode.
- Click the “Spin” tool in the object toolbar menu on the left. It looks like a pie chart with a piece of the pie missing.
- Drag the plus symbol around a little and then let go of the mouse key.
- In the bottom left, there should be a context menu for the object you just spun. Click it and change the number of steps to fit how detailed you want the vase to be (8 steps is good enough because you can always smooth it out later). Additionally, change the Angle to -360 degrees. This will connect the vase around because you spun the line object you just drew into a full circle, creating the vase shape.

- The bottom of the vase will be empty. To fill the bottom of the vase with a face (AKA a shape that covers one part of an object like each square on a cube), go to Edit Mode and click 2. This will select edges, rather than vertices, when you click an object. Select the bottom edges by either holding shift and clicking each one OR holding alt and pressing the bottom line to select the edge you clicked along with any edge directly connected with the edge you clicked. The lines will light up when selected.


- To thicken the vase, select the vase, go to the bottom right menu and click the Modifier tab (picture looks like a wrench). Add a new modifier and select the Solidify modifier. This thickens the edges of the vase so the hole at the top doesn’t look paper thin. To increase the thickness, drag the thickness bar up. Be sure not to do it too much because that will cause polygons to overlap, creating issues in your vase. To check for these overlapping lines, you can go to the top right (where the 4 spheres are) and select the very left one. This is the wireframe view of the object, which only shows edges and vertices of an object. Alternatively, you can hold Z to change the view to wireframe after bringing up the view menu.
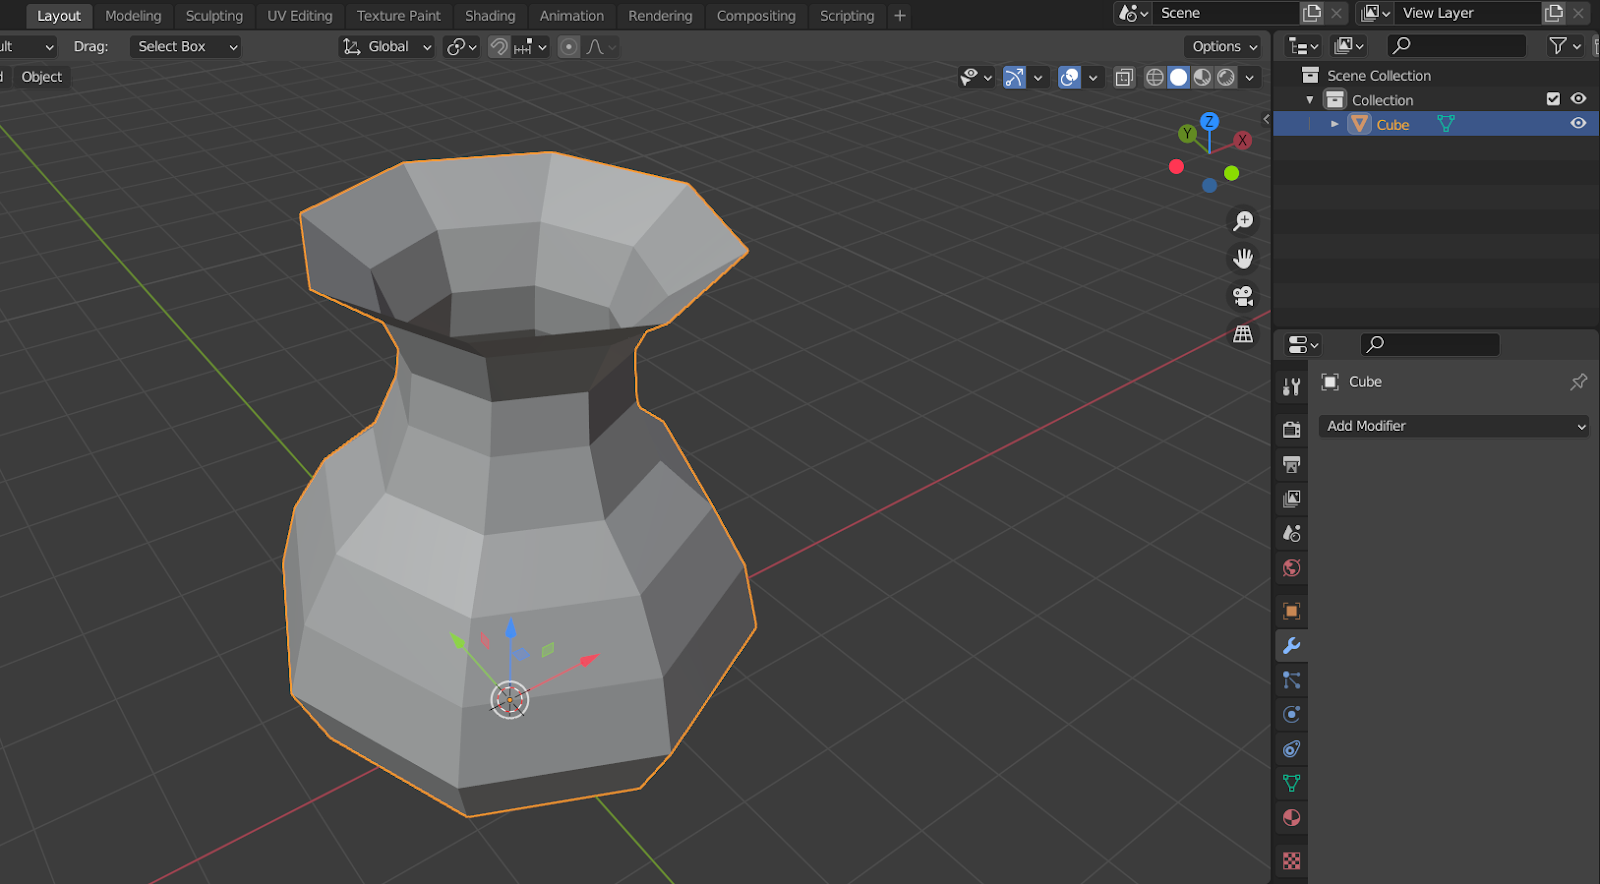


- Lastly, go to Object mode, select the vase and right-click and press Shade Smooth. This will smooth out your object. It will still look a little rough.
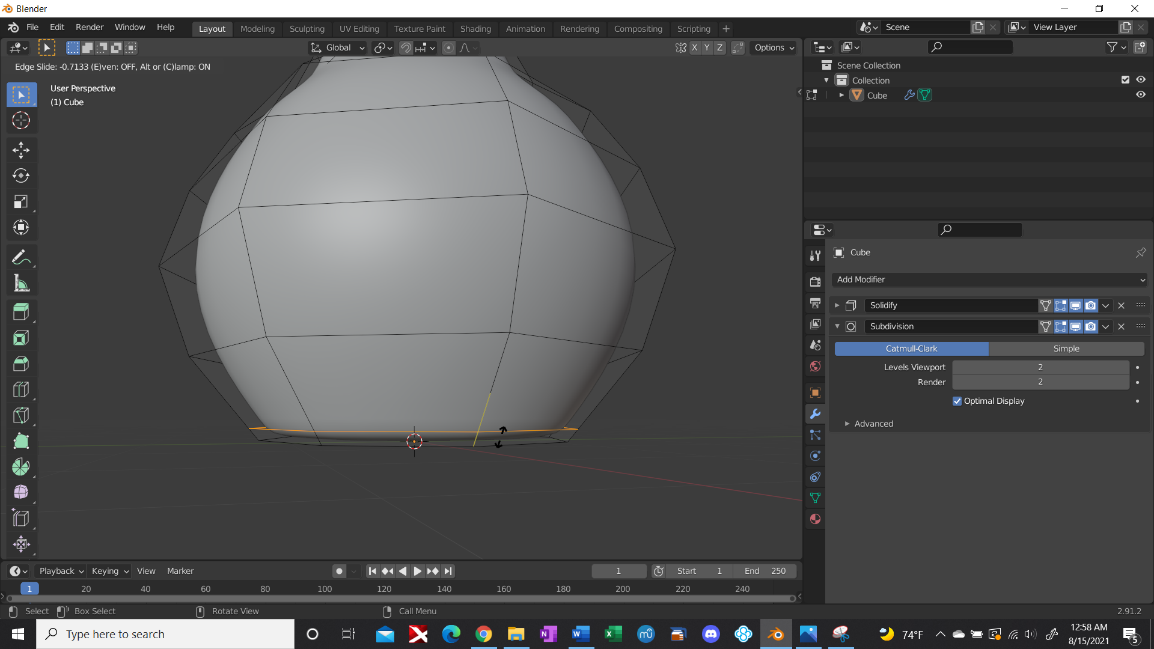
- With your object selected, go to the modifier tab again on the bottom right, add the Subdivision Surface Modifier, and change it to 2 in the Levels Viewport and Render. The former shows you the smoothed look of the vase in the Viewport while the latter only shows what it looks like during rendering. Its usually good to keep both the same. Please note that modifiers are applied IN ORDER from top to bottom, meaning the Solidify is applied first, and the subdivision surface modifier is applied on TOP of the solidified vase we have.


- Now the the vase looks too smooth in some parts. Especially places where we need it to be a little less round (such as the bottom, which should be flatter). To sharpen the definition to the vase in these parts that need to be more edgy and less smooth, use Edge Loops. This will make the vase look a little less round on the edges and add definition. To add an Edge Loop, go to Edit Mode, click Ctrl + R to bring up the edge loops, drag the edge loops close, but not exactly to the edges of the vase. This will sharpen the vase in places that make it look more realistic.


- After you are done sharpening the edges of the vase, click Tab to go back to object mode to view your final model. Voila, you’ve completed the basic modeling shape for a vase!

Very helpful. Thanks!